Grow tomatoes, peppers, leafy greens and more with the VeggiePharm Passive Hydro Starter Kit. This kit contains everything you need to build your first system. Seeds and nutrients not included. Great for schools and classrooms. A hands-on experience.
Contents:
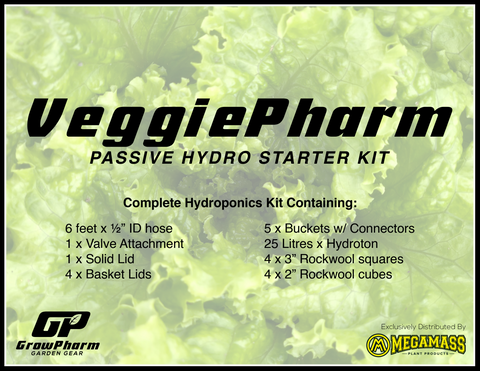
6 feet x 1/2” ID hose
1 x Valve Attachment
1 x Solid Lid for Master Control Bucket
4 x Basket Lid for Grow Buckets
4 x Grow Bucket with tee connector & grommet
1 x Grow Bucket with elbow connector & grommet
25 Litres x Hydroton
4 x 3” Rockwool squares with circular hole
4 x 2” Rockwool cube
1x Instruction Sheet
Bucket Size 14"sq
SETUP:
Step One:
Cut provided hose into desired length. Minimum required is 16”.

Step Two:
Select one Grow Bucket with Tee Connector and locate valve. Attach valve to tee connector using a small section of hose. This will become your Master Control Bucket.

Step Three:
Join buckets together using hose. Bucket order is as follows:
First: Master Control Bucket - Ensure Valve is in “off” position.
Middle: Grow Buckets with Tee Connector (Note: If you have purchased the Extra Bucket Add-On, be sure to include it in the middle of your run.)
Last: Grow Bucket with Elbow Connector

Step Four:
Place Basket Lids on Grow Buckets and Solid Lid on Master Control Bucket.

Step Five:
Place “pH-ed” rockwool containing seedlings, seeds or rooted cuttings in Basket Lids and hold in place with rinsed hydroton balls. (You must rinse your hydroton before using it, as it is dusty.)
Advanced users can also grow directly into the hydroton.

Step Six:
Fill Master Control bucket water or nutrient solution, allowing time for entire system to fill. Water should cover half of the basket.
Lower water levels as roots appear. Only the roots need to be in water once plant is mature.

Step Seven:
Expand your growing capabilities with our air add-on, as well as our tomato and leafy greens expansion kits!
Tips & Tricks:
“pH-ing” your Rockwool:
Rockwool has a naturally high pH of 7 to 8. Prepare a solution of slightly acidic water (pH 5.5 to 6.5) by adding several drops of Mega Mass pH Down to the water, testing with pH strips or a properly-calibrated pH meter to ensure the correct pH is reached.
Sowing Seeds in Rockwool:
Place two or three seeds in the hole at the top of the “pHed” rockwool cube. Once seeds sprout, kill the weaker sprouts by pinching off the leaves on the top, leaving only one plant per cube. Do not attempt to pull the extra sprout(s) out by the root.
Propagating Cuttings (Cloning) with Rockwool:
Take your cuttings off of the mother plant and place in a glass of water for approximately one minute to ensure that no air remains in stem. Then, dip tip of cutting in rooting gel or powder and wipe it away with a gloved finger, leaving behind an invisible layer. (Too much gel/powder will smother your cutting and it will not root.) Ensure that the Rockwool cube holds the cutting in place. Place your cubes in a suitable growth basin at a temperature range of 80-85 degree Fahrenheit until roots appear, generally after two weeks but can be sooner for certain herbs such as mint. The best option is selecting a solid growing tray (clone dome) fitted with a vented dome. Keep your rockwool damp, but not soggy. Once roots appear, your clones are ready to transfer to your bucket system!
Rinsing your Hydroton:
You must rinse your hydroton before using it, as it is dusty. There are several methods for doing this. You may use the basket lids themselves to hold the hydroton while you rinse it, or you can use an ordinary colliander. Rinse it with regular tap water until the water runs clear. Do NOT allow hydroton balls to go down your kitchen or bathroom drain, as they do not break down.
Feeding:
Use only soluble (synthetic) nutrients, such as Mega Mass. Organic and non-soluble nutrients will cause microbe overgrowth, odour and clogging.
Troubleshooting:
Plants falling over:
Arrange hydroton (LECA, clay balls, etc.) to hold your rockwool cubes in the centre of your bucket. You may also use bamboo stakes or tomato cages to hold your plants up. Some plants will benefit from having a fan blowing directly on them, which simulates the wind and creates stronger stalks. You might consider adding a silica supplement.
Bucket is leaking:
Check to ensure that the hose is firmly connected to the buckets and that the grommet has not been displaced. Also, please be aware that in a humid environment, some external condensation is to be expected and does not represent a leak.
Buckets have developed an odour or your roots are brown and slimy:
This generally means that you have bacteria or decaying organic material in your system. This can be cleaned up with the application of an enzymatic garden cleaner or with hydrogen peroxide.You can also mitigate this problem by aerating your water with the Aeration Expansion Pack.
Algae is growing in water or on rockwool cubes:
Algae growth is caused by light. To prevent it, arrange the hydroton in such a way that light is unable to reach your water or rockwool.